Call: 0403 816660 for more information
or email us: enquire@resurrection.com.au |
| How to Build Your Own Front Fence Picket fence construction and Garden fencing (continued) |
Page
2 |
| 1. Rainforest timbers, mainly from 3rd
world countries.
2. Australian hardwoods. 3. Plantation timbers.
We want our products to have a good life
span, but realize cost is a factor, and so tend to use a mix
of the above timber groups. Posts need to be made from a stable
timber to minimize twisting and bending. Pickets likewise need
to be stable as their thickness makes them conducive to bowing.
Capping should be kiln dried to prevent shrinkage. We offer
two grades of materials, which we feel is a good compromise
between the competing demands as outlined above. Our premium
grade fence uses all hardwoods, while our standard grade uses
Cypress posts and a seasoned treated pine frame. We always use
hardwood pickets.
Painting. Whichever timber you use, the best thing you can do for your fence is to paint it properly when new. This means sealing the timber with oil based pink primer before applying two topcoats. Water based primers are not suitable as they do not seal the timber from the weather. House paint such as Wattle Solarguard is suitable for the topcoats. Layout Choose the position of your gates. Pedestrian gates should be about 1 metre wide, while driveways these days need to be at least 3 metres wide. Locate the end posts, and then divide the distances between the end posts and the gate posts into equal sections. Sections should be no wider than 2.7 metres. You will now have the post positions. The next question is whether you will want all featured posts, or whether you want intermediate posts in between end and gate posts. Intermediate posts will sit behind the fence cladding, while featured posts will break up the fence run. The question of intermediate posts is usually determined by another; is the fence to be stepped, or will it run with the ground contour? If stepped, you will need to have all featured posts, while I like to have intermediate posts if running with the ground contour. |
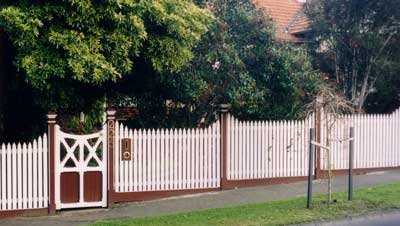
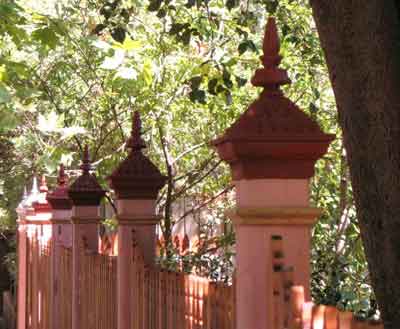
 This woven Wire fence has intermediate posts between end feature posts.  This stepped Victorian fence has all posts featured. The
Posts
The posts are the foundation of the fence and need to be set firmly and deeply in the ground. Post holes should be at least 600mm deep and at least 300mm wide. The depth is important to minimize sideways movement. The deeper the hole, the more firmly will the post be set. Soil type is also a factor. Clay soil can shrink when dry and expand when wet. Soil can be tested for it's stability, ranging from stable to volatile. For instance, Richmond council regards the red clay soil in it's area as volatile and requires one metre deep post holes. Very tall posts will also require deep footings. As a general rule, the depth should be 1/3 of the post height. A 100mm concrete pad should ideally be placed under the post so that the post will not sink. 
This
stepped Victorian fence has all posts featured.
Page (2 0f 4) Go to Next Page
3 |
| Back to Top |
